Collection Before And After

interior design house, house interior design ideas, interior house plans, interior house painting, interior house painting, interior design of a house interior of house, interior of house, interior house designs photos, interior house design, interior house design, interior house ideas, modern house interior

Sunday, January 31, 2010

Bedroom Makeover: Nightstand Edition

So it is now time to make over our bedroom.  It’s still in the drab white that was painted with the house built.  In an effort to maximize our dollars we decided to give our current bedroom suit a make over.  There are several things wrong with it all of which I will fix over time but the first thing that hits you is it’s just plain ugly.  We still haven’t totally figured out why we bought it 10 years ago.  I guess we were young it was in our budget and we needed furniture for the house we had just moved into.  That being said how do you take a 10 year old not so good looking night stand and bring it into the new decade.  Let’s explore this in a little pictorial.


The ugly nightstand
The Ugly Nightstand, Bedroom Makeover and refinishing
I guess really it’s not all that bad but it is far from our current taste in furniture and design.  I have some ideas on how I would like to fix this guy.  The first thing that needs to happen is that I need to remove all that molding next to the drawers.  I just think it really disrupts the look of the nightstand.  So what to do…..   Find one chisel well two actually and one hammer and presto you get the following result.

The Ugly Nightstand Molding Removed
IMG_3291_1024x768
Now how did I do this?  It is not that hard really.  The molding was nailed and glued in place and my goal was to have as little tear out as possible so take one of our chisels and place it on the back edge of the molding and start tapping it breaking the glue joint and prying the molding away.  Take your time and do a little bit at a time.  You are most likely going to get some tear out, not to worry we will address that in a minute.  Eventually you will be able to pry the moldings off of the project and you get to take a cool picture like this one.


Demolition Tools
IMG_3292_1024x768
As  you can see the moldings don’t always come off in one piece no problem I had not planned on using them for anything anyway.  Now we can address any tear out that may have occurred.  There are at least  two ways of dealing with it.  One if you are planning to paint you can fill any of the tear out with wood putty if they are really bad, do this before you start any sanding, let the pudding try and sand it flush with the rest of the wood.  Now if you are going to stain the project then the putty isn’t probably a good idea as the stain at least in my experience will be soaked up more and look different than the rest of the wood.  If you are in this situation or if the tear out is not all that bad then you can do what I did.  I sanded the faces down until most of the tear out was gone and anything that was real deep I smoothed out with the sand paper and made them appear and part of the character of the project. 


A Sanding we will go…..
IMG_3293_1024x768
Here is the result of a few couple of hours of sanding.  I wasn’t worried about totally removing all of the finish that was on the nightstand previously.  I mainly wanted to get it scratched up real good so that the latex paint I am using would have something to grab a hold of and stick to.  If you can get it to bare wood all the better but I didn’t find it totally necessary on this project refinish.

 
And now through the power of the internet we have a mostly refinished nightstand.
IMG_3295_1024x768  This is the first of 2 coats of Satin Black latex paint.  I wasn’t worried about overspray so I didn’t mask off the interior of the nightstand.  Now that the main part of the night stand is taken care of lets focus quickly on the drawers.  Remove the hardware sand as you did with the main section and paint.
IMG_3288_1024x768 IMG_3296_1024x768
You can paint the sides if you want to, I decided it wasn’t needed as the drawers are closed 99% of the time.
Now that you have everything painted you can either put the hardware back on and be done or you can distress things just a little.  I spent a little time sanding off the paint in some key areas.  It is pretty hard to tell from the picture but there are several distressed areas.  I took the sand paper and sanded until I got bare wood and then took a little stain and stained over the area let it dry for just a little while and wiped the excess away.  Once I was done I had the following refinished nightstand.
IMG_3300_1024x768

So I hope you have fun taking on your own refinishing project.  If you have any questions please feel free to email.

Here is a before and after side by side:
IMG_3285_1024x768 IMG_3300_1024x768

Have a great day!  --Grover


SUNDAY POETRY: "FLYING FISH"


  Sunday: The day to indulge a poetry addiction.


Flying Fish
by Carl Sandburg

I have lived in many half-worlds myself... and so I know you.

I leaned at a deck rail watching a monotonous sea, the same circling birds and the same plunge of furrows carved by the plowing keel.

I leaned so... and you fluttered struggling between two waves in the air now... and then under the water and out again... a fish... a bird... a fin thing... a wing thing.

Child of water, child of air, fin thing and wing thing... I have lived in many half-worlds myself... and so I know you.


Photograph of a flying gurnard by Elaine Duigenan

OUTTAKES: THE BACKSTORY

 
As usual in writing a book, a lot of good stuff ends up on the cutting room floor, so to speak. This outtake was hard to let go of, more so because I didn't write it:
Gently they go, the beautiful, the tender, the kind;
Quietly they go, the intelligent, the witty, the brave.
I know. But I do not approve. And I am not resigned.

-Edna St. Vincent Millay
Dirge Without Music

THE LONG-DISTANCE WANDERINGS OF LEATHERBACKS


I'm on a leatherback sea turtle thread at the moment—not the sole focus of DEEP BLUE HOME... but recurring characters. I love their wanderings.

Seriously cool-beans stuff is coming out of satellite tagging of these awesome creatures. Check out the track maps at the Caribbean Conservation Corporation.

You can adopt a leatherback and help fund the conservation work. I just adopted the lovely Panamanian leatherback Naya.


From the CCC website:

"NAVIGATION: In the open ocean, sea turtles encounter strong currents; they have only modest vision, they can only raise their heads several inches out of the water, and there are often no visible landmarks. Even with these limitations, sea turtles regularly navigate long distances to find the same tiny stretch of nesting beach. How they do it is one of the greatest mysteries in the animal kingdom, and finding an answer has been the focus of generations of researchers. One promising new theory on how sea turtles navigate suggests that they can detect both the angle and intensity of the earth's magnetic field. Using these two characteristics, a sea turtle may be able to determine its latitude and longitude, enabling it to navigate virtually anywhere. Early experiments seem to prove that sea turtles have the ability to detect magnetic fields. Whether they actually use this ability to navigate is the next theory being investigated."

Saturday, January 30, 2010

RANDOM EXCERPT FROM "DEEP BLUE HOME:" SEA TURTLES IN THE ICE REALM


"It's not surprising to see a leatherback up here
on the edge of the ice, since this is one of the most traveled
of all vertebrate species, perpetually on the move along
jellyfish highways between the tropics and the high latitudes."


DEEP BLUE HOME
-Chapter 14
The Distant Geography of Water


Photo courtesy COML.org

SWIMMING TOWARD THE LIGHT


The book is really on its way.


Working through copyediting,
proofreading, blurbing, printing,
and all the months of detail work
between typing The End
and appearing on the New Nonfiction rack.


Birth date 9 July 2010.

I'm starting to feel a flutter in my stomach.

COMING SOON!


A new book.


A new blog.


One to elucidate the other.

Please check back.

Beginner Woodworker Tools

Today I want to talk about some of the basic tools of woodworking, some of these tools you will have some you will want and some are necessary for successful projects. 


Lets focus on small and medium sized projects:

If you are working on smaller projects you may not need a table saw or other “advanced” tools to complete the project.  Take for example the Coffee Table featured here:
IMG_3238_1024x768[1] I completed this table using only a Compound Miter Saw, a biscuit jointer, a Kreg Pocket Hole Jig, Clamps and a Random Orbital Sander sometimes referred to as a ROS.  In this scenario the the biscuit jointer is not necessary however it does make life a lot easier.  The one thing to note on this table is you want to get very straight boards.  If you get boards that are bowed or cupped meaning that there is a bend in the board and it looks like it arcs or has the beginnings of a U shape you will not get a clean joints.  There are ways to fix those issues in the wood but those required additional skills and tools which I will not get into at this time.  To build this table with the tools mentioned earlier you would use the Miter saw to cut your 2x4’s to length.  The biscuit jointer will allow you easily join the boards together, the pocket hole jig will allow you to attach the top to the base with ease and the sander is there, well to sand and prepare the wood for the stain or paint that you will be using. 


Purchasing tools:

As far as purchasing your tools you have many options you can get most of these tools at the big box stores or a Woodcraft and online.  If you are budget minded and you can order from Harbor Freight, I don’t believe you can get the pocket hole jig there but that is available at Lowes or Woodcraft.  Harbor Freight sells tools for a fair price and typically they are good quality.  You do have to be careful with what you get from them.  My biscuit jointer is one of theirs and I have had great luck with it.  My father has one of their miter saws and he loves it.  One other option if you are looking to possibly get brand names is Craigslist.  I have had real good luck with buying from Craigslist.  I purchased a Jointer and a Planer from craigslist and got both of them for less a either one of them would be now, both are brand names however both are probably 15 years old or better.  Each of those tools work great.  If you do decide to buy from Craigslist make sure you do some research on the tools ask for the model numbers if available before committing to the purchase always go look at the tools and ask to see them work.  One thing I forgot to mention is that I used was a band saw to create the taper on the legs.  You could also use a jigsaw to create the same taper and save some money on the tool. 


Well to wrap it up.  If you are beginning to woodwork I would suggest the following tools to get you started, a Jigsaw, Miter saw, Biscuit Jointer, some kind of Sander.  I briefly mentioned clamps.  These can get expensive, for a cheap alternative for the time being you could purchase some ratchet straps and use those to pull the wood together.  If you don’t already have them for around the house work I also suggest a power drill either cordless or corded.  That should get you building and allow you to tackle several projects.


Friday, January 29, 2010

Chair Design Part 2

I spent some time yesterday trying to come up with several different blends of the chairs. I think I like the last set the best and will probably be what we go with.

Chair Set #2

chairs2

I didn’t like the way the base turned out on this set of chairs.  It looks like it might be slightly unstable.

Chair Set #3

chairs3

This set of chairs is my current favorite, I like the overall design I need to fix structure underneath for support but I think these will be viable solutions.

Let me know what you think about the 3 different sets.

Thursday, January 28, 2010

Chair Design

I have started working on potential chair designs for a new Dinning Table Set that I am going to be building in the near future.  My plane is to build the majority for the framing structure from 2x4’s.  The picture below is a rough sketch of what I am thinking about.  The sketch is not to scale or size currently.  I will post those once I get that taken care of and I also have a third design I am going to work up.  It will be the same principal however I will change the skirting just a little bit.  Here are the first two designs.  One thing to note is that the backs will be curved and slanted, I have not figured out how to do that yet in SketchUp.
Chairs

Wednesday, January 27, 2010

Holy Readers Batman

Thank to all the fans of Knock Of Wood who swung by.  I am very delighted to have you here.  If you don’t mind leave me a message and tell me what you would like to see on the blog.  If you want custom designed pieces that you can build I can get into that or if you want to just continue to see the stuff I am doing in the shop that’s great as well.  I am looking for ideas to make this a fun and informative blog for the new woodworker, aspiring woodworker, and even you old pros. 

I am a fairly new woodworker.  I have always wanted to have my own shop.  I really enjoy the process of taking raw lumber and molding it into a piece of art or a functional piece of furniture.  My secret desire well okay maybe not so secret is to start building guitars.  I am a guitar player but I think I am more of a woodworker and that leads me down the road of wanting to build the instrument that I enjoy playing. 

I am hoping to start a couple new projects in the coming weeks so stay tuned.  I am going to start working on a couple of plans for some chairs and a Farm Table.  It will be something similar to what you can see at Knock Of Wood but my goal is to make it expandable for the holidays when the family comes in.

Feel free to comment or shoot me an email.

Tuesday, January 26, 2010

A Pen for my Father-In-Law

My father is a captain with a major US airline.  I had made him a pen a year or so ago and he wanted another one.  I let him hunt through my stash of blanks and he found one that looked like it could be clouds.  The more I turned it the better it got and finally came out with this.

IMG_3271_1024x718

Sunday, January 24, 2010

A Pen for the Wife

I purchased a couple of Lime Green blanks for my wife and I from exotic blanks and I created this for her today.  I hope she likes it.


Saturday, January 23, 2010

Fountain Pen

Here is the latest Fountain Pen that I made this weekend.

I am very happy with the way it turned out.  I think this is going to be a nice pen.  Just trying to figure out if it will be a gift or a personal pen.


Coffee Table Complete

I got all the clear coats on and they are dried.  I have it in the house and think it looks pretty good.


Check out Thrifty Homes Penny Pinching Party!


Beyond The Picket Fence


Featured on:
Knock Off Wood: BRAGGING BOARD: So many projects!

Friday, January 22, 2010

Coffee Table Part 3


Ah a half day Friday.  I took the opportunity to spend a little time in the shop this afternoon.  I was able to complete the base of the table.  I also got it stained.


I also got it stained.......


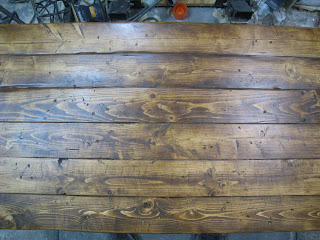
Not only did I get it stained I got it attached to the top and then got the top stained.  I am not waiting on the whole thing to finish drying.  Once it is finished drying I will spray it with some satin poly and bring it inside.


Coffee Table Part 2

I had a little time in the shop last night and was able to get the legs cut, shaped and sanded.  I also took off most of the first pass of stain.  My wife and I then proceeded to beat the heck out of the table top and today I will finish sand the top and re-stain everything.  However first I am going to layout the skirting on the bottom of the table and use a method I haven't used before for attaching table tops.  I am going to use the Kreg Pocket hole system to attach it.  I am trying different ways of attaching the tops so that I can decide which way I like best.  Once I have that all together I will stain the top and then the base separately and then attach the two.

Below are a couple of updated pictures


Wednesday, January 20, 2010

An Organized Kitchen

2010 01 19_2476

Since January seems to be “organization” month.  I thought that I would show you how I organize my kitchen.  First, I hate a cluttered kitchen because that’s where I spend most of my time and I need the space.  During the day, my counters get full of food, paper, snacks, cutting boards, books, laundry, markers, paint, crayons, glue, bottles, barrettes, etc. so I need space to put them.  If I have too much on the counters,  I feel squished!   I only have a few decorations which I am always switching out and the only small appliance that I keep on the counter is toaster oven because we use it all the time.  When we got married, we chose not to use a microwave for health reasons so we heat up all our food in the toaster oven.  The rest of my small appliance are kept in my cabinets.

Here are some more pictures of our kitchen.

2010 01 19_2477 2010 01 19_2479  2010 01 19_2481 2010 01 19_2490 2010 01 19_2507  2010 01 19_2509 2010 01 19_2512

Here is my pantry.

 2009 11 10_1180

I organized it my pantry with Tupperware modular mates.  I love them!!!  They fit perfectly.  I like having clear containers so I can see what’s in it and I know if we are getting low.  I also labeled each one until my labeler stopped working. 

2009 11 10_1187

2009 11 10_1186

2009 11 10_1185

2009 11 10_1184

2009 11 10_1188

I hide my aprons in the corner.

2009 11 10_11892009 11 10_1190

2009 11 10_1181

Don’t forget your fire extinguisher!  Every kitchen needs one!!!

2009 11 10_1182

I also keep a lock on the door!   It helped for a couple of weeks until they learned how to open it.

2009 11 10_1197

Here is my “baker’s corner” cabinet.  I keep most of my baking supplies and mixes here.  I also keep my mixing bowls and hand mixer close by.  I don’t like going all around the kitchen looking for something.  That way everything that I need is right there.

2009 11 16_1136

I also went through my pots and pans.   I am only keeping what I really need.  Why do I have like 20 pots?  I keep all of my pans under the stove in the drawer so I can have more room for my pots in the cabinet.

2009 11 23_1095

I took out a shelf and now I can stand up my cutting boards, baking sheets, muffin trays, cooling racks, etc.

2010 01 20_2553

I got rid of all this…

 2009 11 23_1104

and turned it into this….

2010 01 20_2576

I decided to go all Pyrex.  I love it!!!  It is way easier to find thing and now I keep the lid on so I don’t loose it. It is way easier to heat things heat in the toaster oven too!

So, I hope that you liked my kitchen! I will show you the rest later.  How do you organize?

Bonnie :)

Related Posts Plugin for WordPress, Blogger...